Add a New Offering
Overview
The following step-by-step workflow will explain how to publish a new offering on the Investor Portal to your investors. Before you begin, you should have already completed the project build. At the very least, this should include the entity and the class(es) that the new offering will be associated with. If you need additional guidance on this, click here.
You should also have your eSignature template set up before setting up your offering, as you will need to select one or multiple templates to finalize the new offering workflow. If you need additional guidance on this, click here.
Step-By-Step
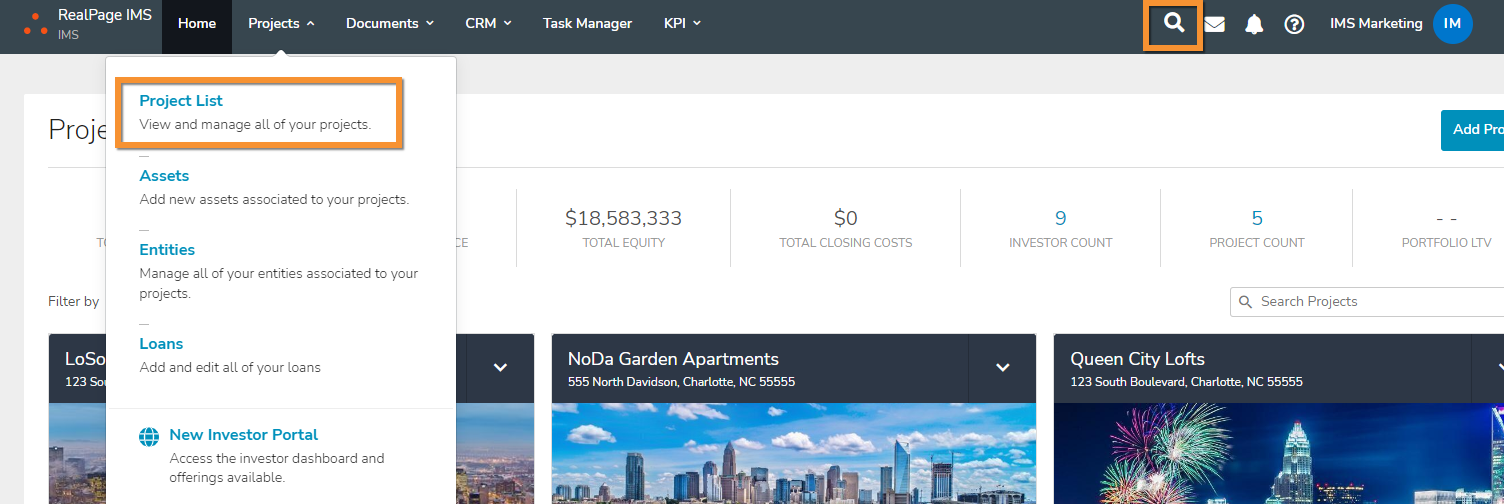
1. Locate the project by selecting the Projects tab and choosing Project List from the drop-down menu. You may also search for the project name using our Global Search feature (top right):

2. Select the entity within the project that you would like to associate the offering to. Once you are within the entity, select the three action dots under Project Actions and select Edit Classes from the drop-down menu:
3. Investment Details will be the main section of focus, with various subsections when creating your offering. To get started, select the plus button to expand the section.
The first option is the Accepting Investments toggle. The default is for this toggle to be OFF, which allows the option to add promotional text about this offering, letting investors know that there is an upcoming deal on the horizon.
If this is toggled to the ON position, it will give investors the ability to place investments through the portal.
4. Scrolling down will take you to the Tile Information section - Please note that this section is optional, however, it is recommended as this will allow investors to easily identify the offering tile or discover active funding details about the offering. You may add details here to display to investors on the dashboard, whether Accepting Investments is toggled to the ON or OFF positions. The first option is to display a Tile Teaser Banner. This allows you to promote or highlight key details of the deal.

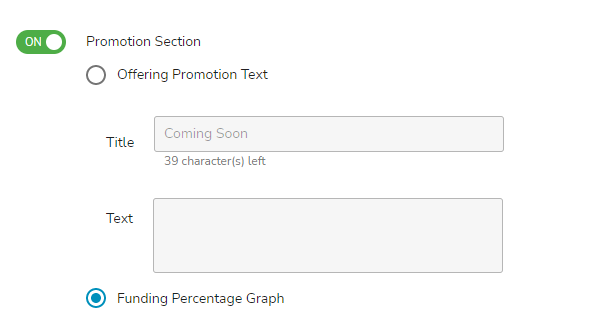
5. The Promotion Section allows you to add promotional text about the offering, which is a great way to keep the investors enticed to invest. Feel free to add your own title to overwrite the system default. The other option here is to add a Funding Percentage Graph that shows the funding progress in raising capital within this specific offering:

6. The Investment Page Content section allows you to toggle your Header Background Image On or OFF, and add generalized details about the offering to your investors in the Content field. Note that numerous editing and formatting options are available at the top bar of the rich text editor.

7. Below the Content field is the Gallery of your project-specific asset images that were added for each asset. These can be added or removed within the Edit Project or Edit Asset pages at any time. Turning the Gallery toggle to the ON position ensures that the asset images will display on the offering (once it has been published). Instead of deleting images, you can select the green checkboxes for any images you do not wish to display to investors. Seeing the green checkbox ensures that they will be published with the offering from a left-to-right display order. By default, the primary image will be the leftmost image - Once an image is selected, the investor can view the photo in full resolution and click through the various images from that view. Note the ability to click the star icon to set the primary image - This updates the front face of the offering tile and helps you to not have to go back to the Edit Asset or Edit Project Page to reorder your photos. 

8. The Asset Details section allows you to add more granular details about the asset through content or through various asset metrics. Adding this information is encouraged, as this allows investors to learn details that are specific to the asset and helpful for investors when deciding whether or not to invest. Enter asset-level details into the Content field and select Add Metric, if applicable.

9. Investor Signing Documents is the last subsection within the Investment Details section. Here, you will be required to select 'Add eSignature Template' and associate your particular template(s) to a class within the Associated to drop-down. The last requirement is to add a Filename that will show to investors when downloading an executed copy of this document. If you are using multiple eSignature templates for this offering, a banner will display to let you know that the filename that you enter is what the investor will see on any browser download of the executed documents. This is because the final copy is a combination of all signing documents merged into one. If one or more of your eSignature Templates require 1 or more Countersigners, please note the Electronic Document Countersigners section will only populate when the Accepting Investments toggle is in the ON position.
10. Lastly, you will need to navigate back to the project list, select the project you are working on, and select the Publish button to make the offering live on the Investor Portal. This is typically the last step if you do not have existing investors in this deal already. The offering will now be live on the Open Investments tab (for investors not previously invested in the class), allowing them to see the tile for the offering you have built. As an alternative, you may also publish the project first, and wait to publish the class that the offering is associated with as a last and final step.