Yardi Voyager Integration - Manual Process Setup
Overview
IMS is pleased to provide a standard Yardi accounts payable CSV commonly referred to as the “FinPayables” ETL file. With proper setup, this allows users to export a file that includes all of the relevant payment information and relevant Yardi vendor, property, and GL codes to push data from IMS to Yardi. Below you will find instructions on how to map between the systems and enable users to pull the file for distribution batches.
Note: For more information on how to setup the API integration after completing the basic setup below, please visit Yardi Voyager Integration - API Setup.
Standard Payment File Configuration
Access the Yardi integration via Profile and Preferences > Admin Settings > Integrations > click the Yardi Integrate button.

Once you select Integrate, you will land on the setup page. This page is designed to facilitate mapping all of the GL Codes, vendor codes, etc. that you need to capture in IMS to produce a file that Yardi can consume. The settings are designed to handle a variety of scenarios and accounting setups that clients have presented to IMS. This document will review each setup feature below.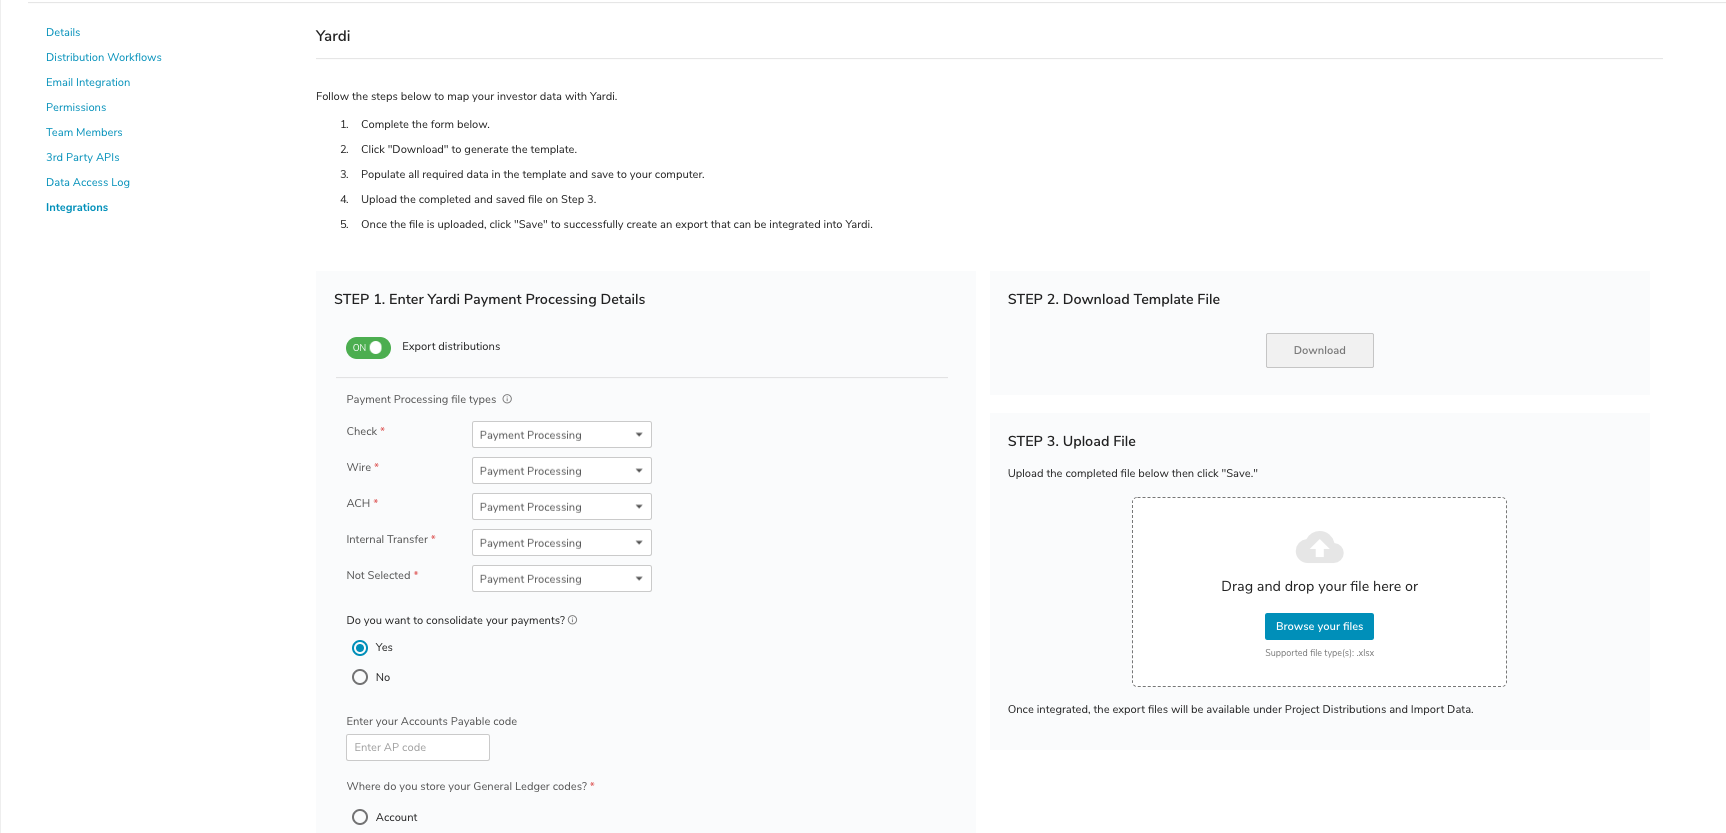
Step 1: Payment Processing File Types
This section contains the IMS Payment Preference descriptions. You can choose to control what types of payments you wish to include on the Yardi FinPayable file. The default setting includes all types. Users may choose to exclude types that are not being paid through the Yardi system. Users can also select Journal Entry Only if you want to include a payment on the file but just for record keeping in the accounting system. Selecting Journal Entry Only will create an entry on the file with the Adjustment field marked as True.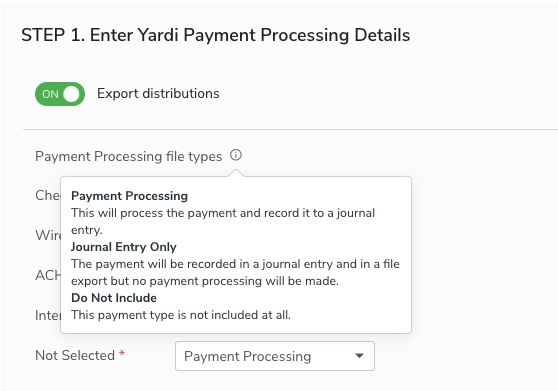
- Do you want to Consolidate Payments?
Use the Yes/No indicator to indicate if you want Yardi to consolidate payments on the file. Please note this does not consolidate amounts on the file itself but is merely an indicator for Yardi on how to handle multiple payments to the same Vendor in the same batch.
- Accounts Payable
If required, input your company’s Accounts Payable code. This will populate the “Accrual” field on the Yardi file output.
- General Ledger Codes
Use this to tell us where you store your GL Codes. Do all of your investors use the same GL Codes? If Yes, select Account and then tell us whether you have Subaccounts. If you select No, just input the common GL Code you use.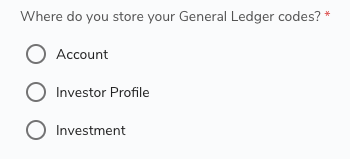
If you select Yes, you will receive input fields to map the GL Code based on the IMS Distribution Bucket (Pref, Return of Capital, Excess Cash, Promote). Based on your inputs in this scenario, the system will provide a row for each unique GL. If you use the same GL in multiple buckets (i.e. same for Pref and Excess Cash), the system will aggregate the amounts and provide one-line item.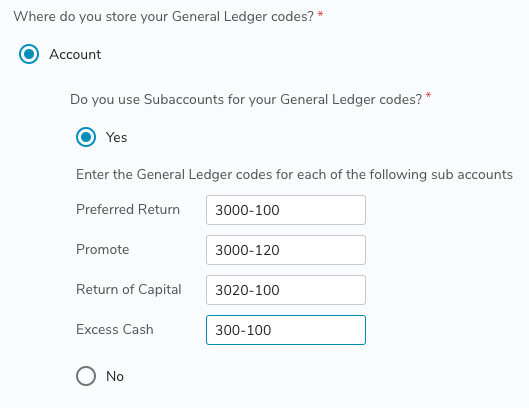
Reminder: If you have unique GL Accounts for each of your investors, or even down to the Investment Level, you can select the Investor Profile or Investment option as applicable. This will help generate a file to populate which we will take a look at in a minute.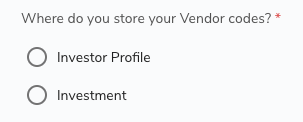
- Cash Account GL Code
Tell us whether you use a common Cash Account if required, or if you select No, the system will provide a file that gives you the opportunity to define at the Investor or Investment level based on your selection above.
- Advanced Settings
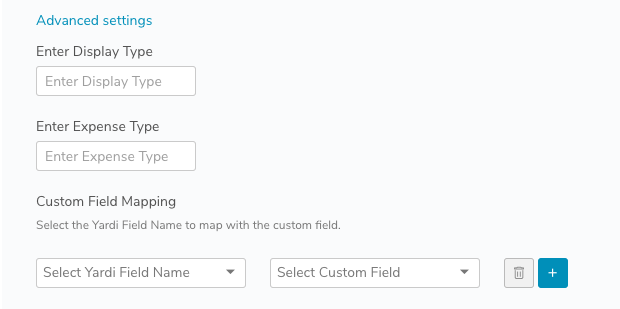
If your setup requires, you can input a unique Display Type and/or Expense Type (i.e. Distributions, Financial Transaction, etc.), you can input here, and it will render on all of your exports. If you have custom field mapping, you can map that here.
Step 2: Download Template File
Once you answer these questions, it is time to download a file to input the required values. Click Download to generate the file.

Once your file is generated, you can open it and will see two tabs. First, there will be an Investor Level or Investment Level tab based on how you answered the questions during setup. The file will provide a location to add at a minimum Yardi Vendor Codes for your investors, and if you store GL codes at the Investor or Investment level, there will be an additional column to populate.
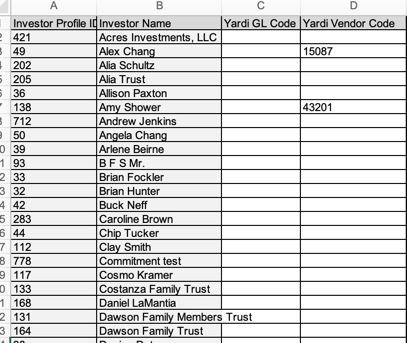
Populate the relevant values for your Yardi Vendor Codes and if applicable GL Codes. You do not have to include a value for all of your investors and prospects and you can download a file in the future to handle updates or new investors/investments as applicable, so maintenance is a breeze.
The second tab on the file will be titled “Entity Level”. These are the internal entities in the IMS system that will need to have the associated Yardi Property Code if applicable. In addition, if any of these Entities are also investors in other deals, you will want to populate the Yardi Vendor Code column. Similar to the other tab, you can update these and add values to new Entities in the future.
Step 3: Upload File
Once the file has been populated, save it to your desktop and then you can either drag and drop the file into IMS or browse your desktop to find the file.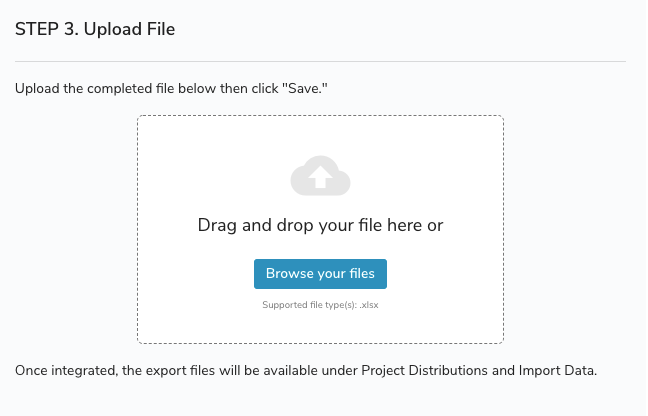
Finally, click the Save to save your changes. Depending on the size of your account, the file may take a few minutes to process. You will receive an email confirming that the file processed. Once you receive it, you are ready to export files.
To generate a Yardi Payables File, you have several options. First, you can access it via any Entity Level or Project Level Distribution Batch:

Users can also run files from the Import Data section of the app for pending and archived batches.
Users can also aggregate multiple batches into a single file using the Bulk Actions menu.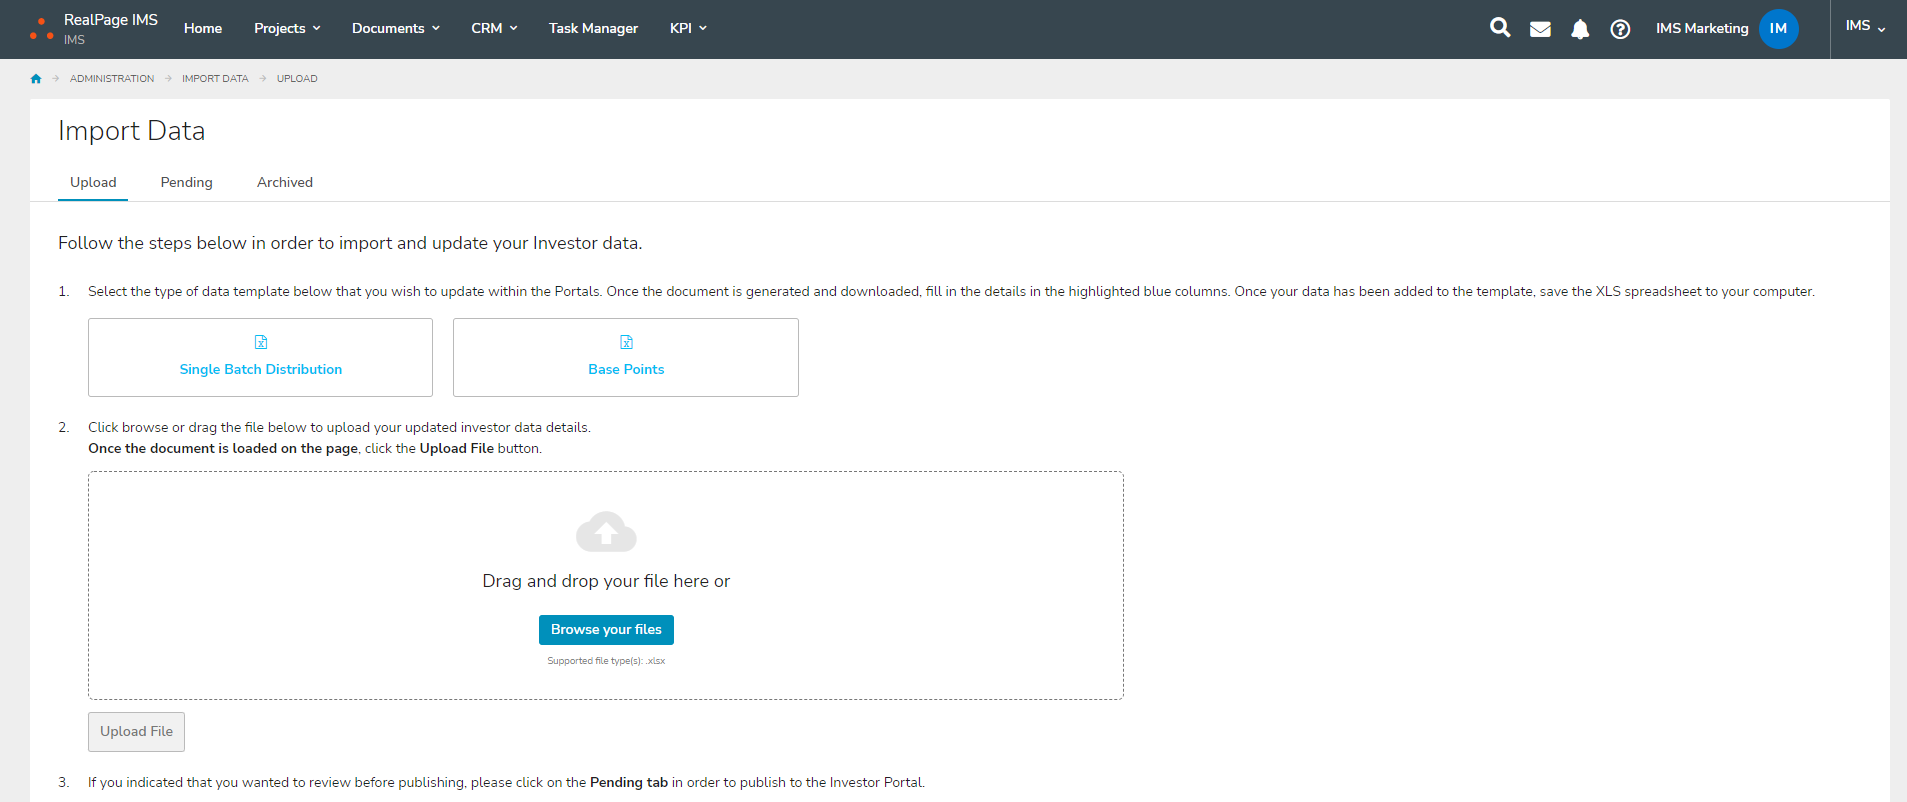
Regardless of where you run the file, the relevant batch(es) will render in a consistent format based on the data you populate.