Getting Started
Overview
The IMS Waterfall module provides a rule-based engine that allows Real Estate Sponsors to calculate distribution amounts due to investors. The system allows the user to configure and arrange multiple rulesets at the Entity-level, and then combine them into a Project-level ruleset for multi-tier structures.
This article will provide you with detailed instructions on how to set up and maintain your rulesets over the life of your project. For your convenience, the IMS Waterfall module contains templates geared toward particular calculations to ensure minimal input on the Sponsor's part. The 8 waterfall templates available for use are displayed below:

Before you get started:
When you are ready to set up your rulesets, you will want to have the relevant Operating Agreement or other documentation that clearly describes the order of your waterfall, along with pertinent definitions that may highlight specific Preferred Return rates, IRR, and Equity Multiples for hurdles.
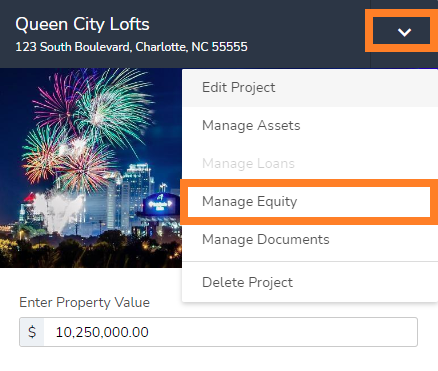
To get started, you will need to go to the Waterfall tab within the Equity module for the specific project you want to add Entity-level rulesets for. If you have a multi-tier structure, you will need to add the individual Entity-level rulesets prior to creating a Project-level ruleset. To get started, you can either go to Manage Equity from the Home Page project tile (drop-down arrow), or go to the Project List page and select the applicable Project:


Once you select a project, you will land on the Project Summary page (List View). From here, you can jump to the entity that you want to create rulesets for. In the example below, we have a multi-tier structure. You can add and enter the rulesets in the order that the relative Operating Agreement suggests. You will need to ensure all of the entities you want to distribute cash through are accounted for before creating a Project-Level waterfall. Simply navigate to the Entity you want to add rules to. Once you select the entity name, you will be directed to a screen where you can access the Cap Table, Waterfalls, Distributions, Projections, Documents, and Custom Dashboard Metrics tab. Navigate to the Waterfalls tab and select the Add Waterfall button:

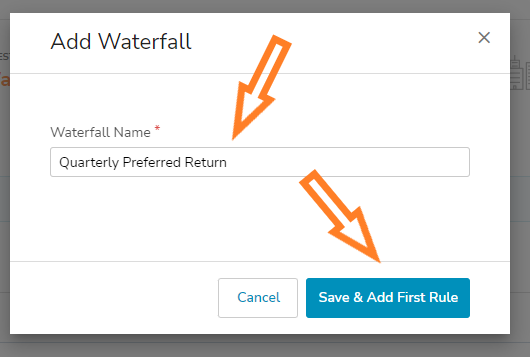
You will be prompted to name the Entity-level Waterfall. You can have multiple waterfalls, so use a name you will recognize (i.e. Quarterly Distribution, Capital Event Waterfall, etc.). This is completely customizable so use what will make sense to you when you are ready to run your waterfall in the future. When finished, select Save & Add First Rule:

Now you are ready to add your waterfall rules according to the distribution section of the applicable Operating Agreement(s). For more information on how to properly add these waterfall rulesets, click here. For an overview and general description of each waterfall template, click here.