Project Level Waterfalls
Preconditions
- All entities that you want to tie into the Project Level Waterfall have an entity-level Waterfall created. You will want to ensure that this Entity level ruleset has the necessary rules to ensure all cash is distributed to avoid any errors.
- If you plan to generate NACHA files, you will need to associate the necessary Bank Account(s) that you want to distribute funds from to the Entity. You can always add or edit this after the fact if you do not have it available or need to make any changes.
- Have your relevant Operating Agreement(s) available for reference in case you need to review them while setting up your Project Level Waterfall.
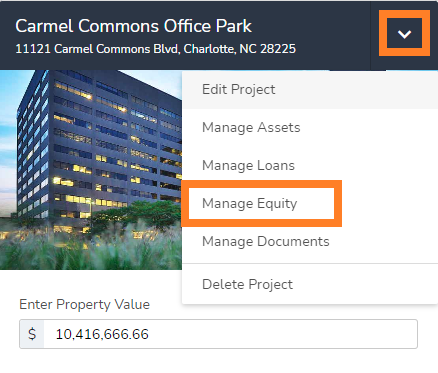
To get started, you will want to be in the Project you wish to work on. Similar to building the Entity Level Waterfall, you can enter a project either through the Home tab using Manage Equity on the relevant Project Tile, or you can select the Project through the Project Summary Table.

As before, when you select a Project you will land on the List View for that project. From there you can switch to the Waterfalls tab and select Add Project Waterfall.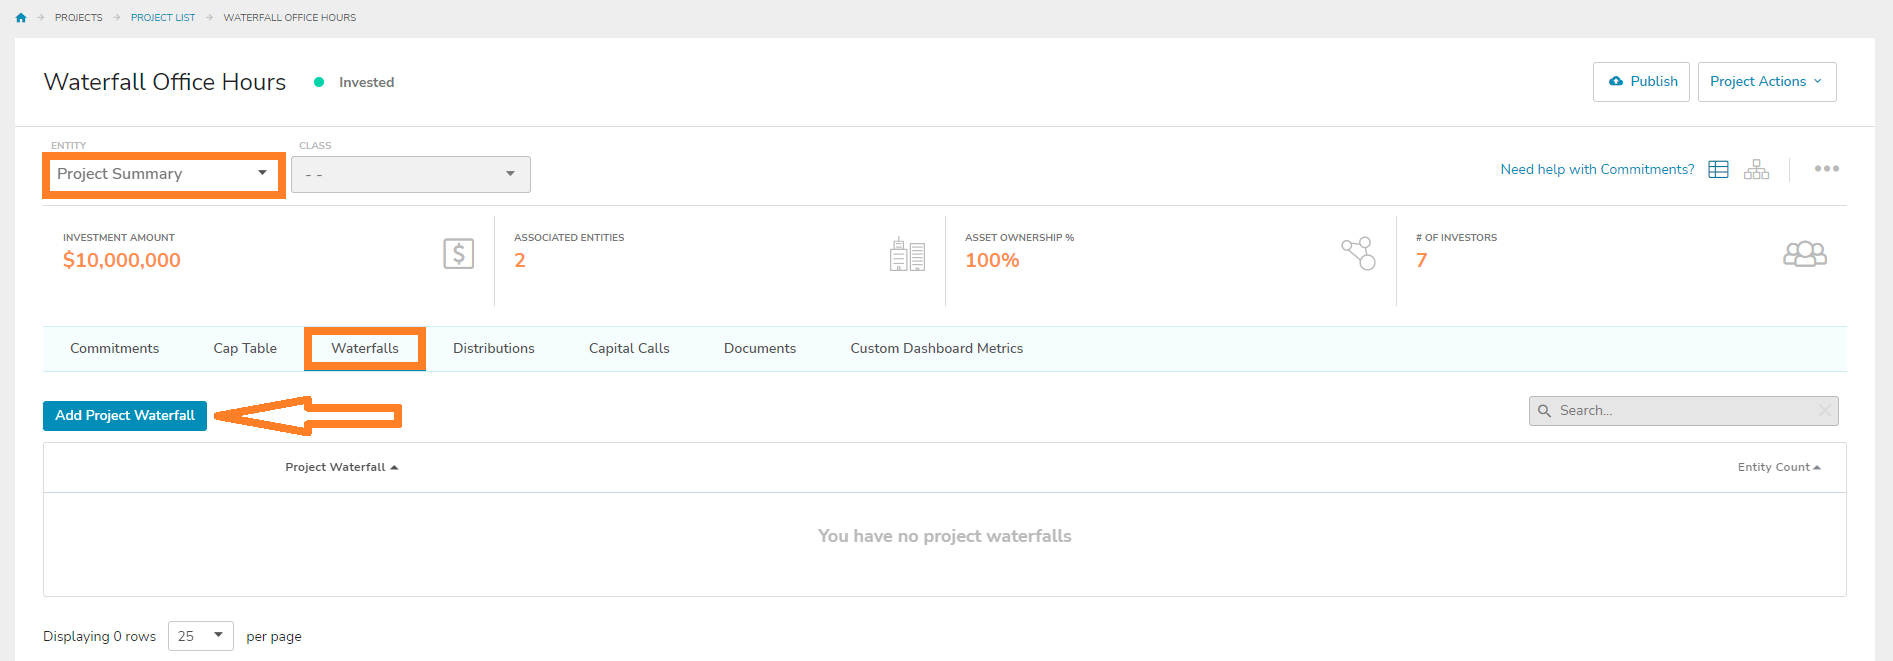
This will prompt a dialogue box for you to name your Project Level Waterfall. This is customizable, and you can have multiple Project Level Waterfalls for a given Project. Name the Project Level Waterfall something that you will recognize particularly if you are going to have more than one (i.e. a quarterly distribution ruleset vs. a capital event ruleset). Select Save & Continue once you name your Project Level Waterfall.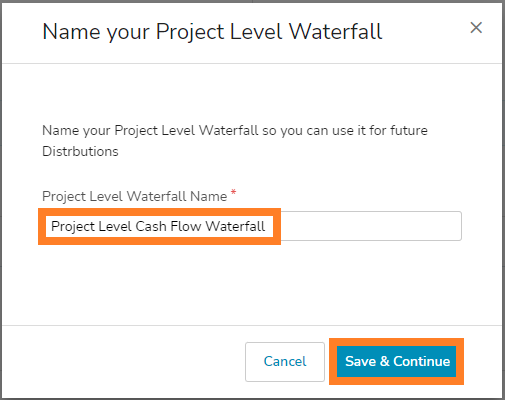
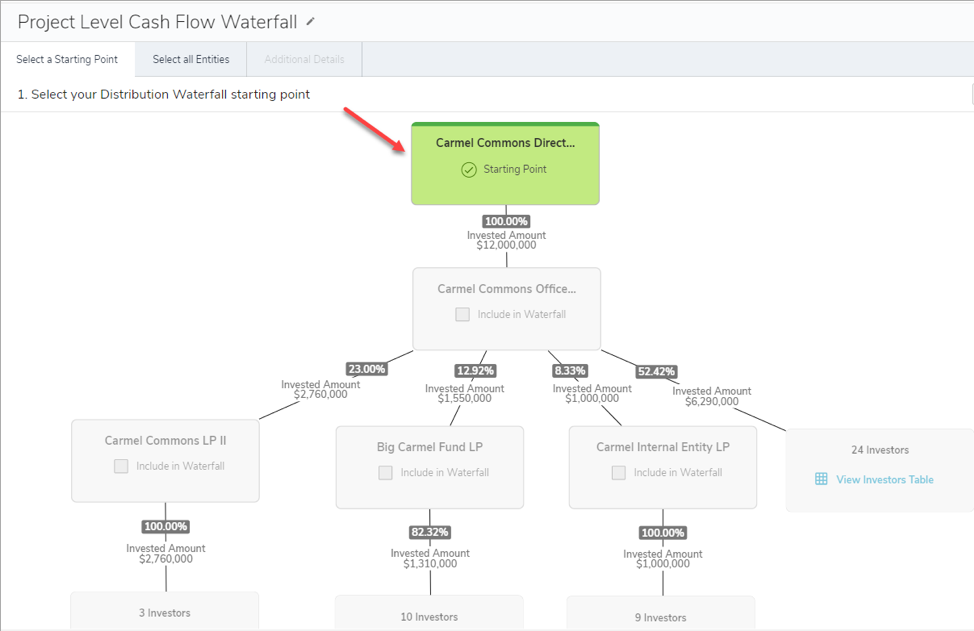
You will land on the Org Chart view for your Project to facilitate building your Project Level Waterfall. In the first step, you will assign a starting point for your waterfall. In this example, there is a three-tier structure. Either of the top two tiers would be an acceptable starting point. If your first tier is solely a pass-through entity, you can skip or choose to include it in the project-level waterfall. In this example, the top Entity will be the starting point. After you select your Entity, it will turn green and you can select Next at the bottom right.
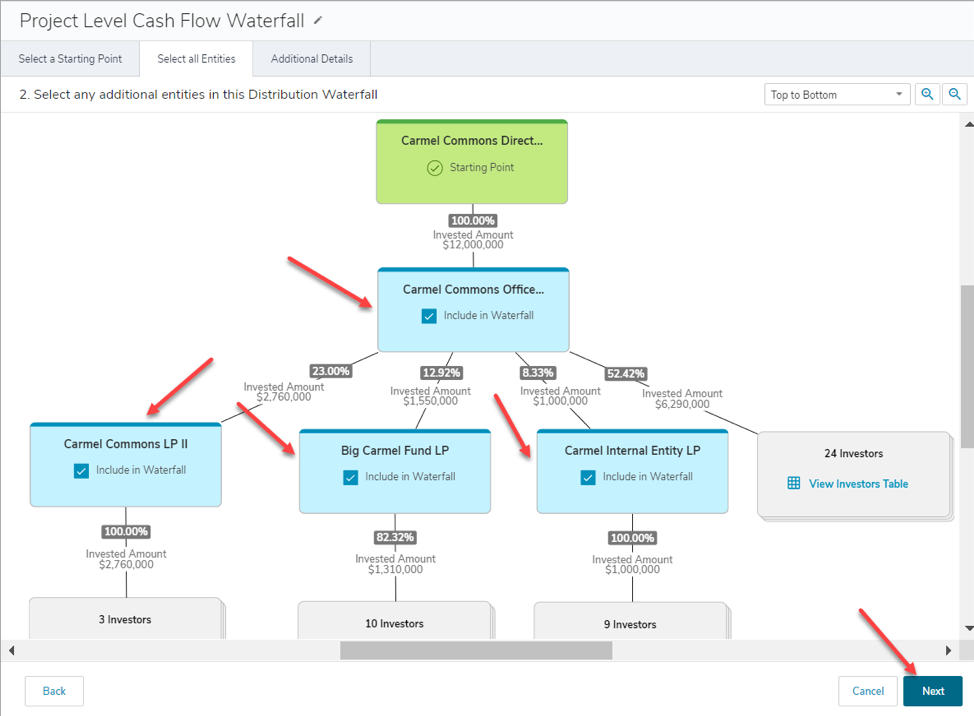
Once you select Next, you will move to the Select all Entities tab. On this tab, you will select all of the remaining entities to whom you wish to distribute cash. Simply select the Entities you will work with. Once selected, they will turn blue. Once you complete this step, the system will know where you want to start distributing cash and what Entities downstream should also be included in the waterfall. Select Next when you are finished.
The Additional Details tab is where you will select the Entity level Waterfall Rulesets and Bank Accounts you wish to use. 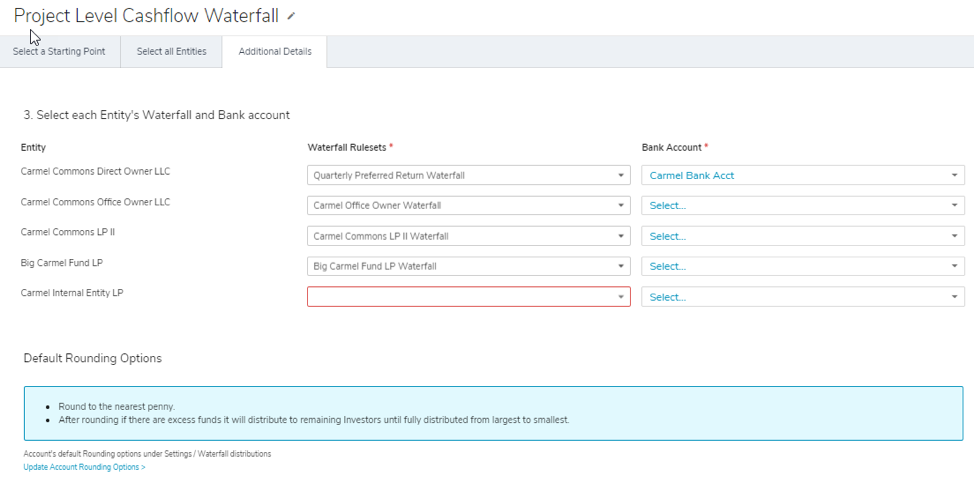
When you land on the page, you may see some Waterfall Rulesets already selected. This will occur if you only have one Waterfall Ruleset for the particular Entity. In the example above there were four Entities that only had one ruleset, therefore they are pre-populated. The Entity called Carmel Commons Office Owner LLC has multiple rulesets available in this example. The user will need to select the drop-down and pick the appropriate ruleset.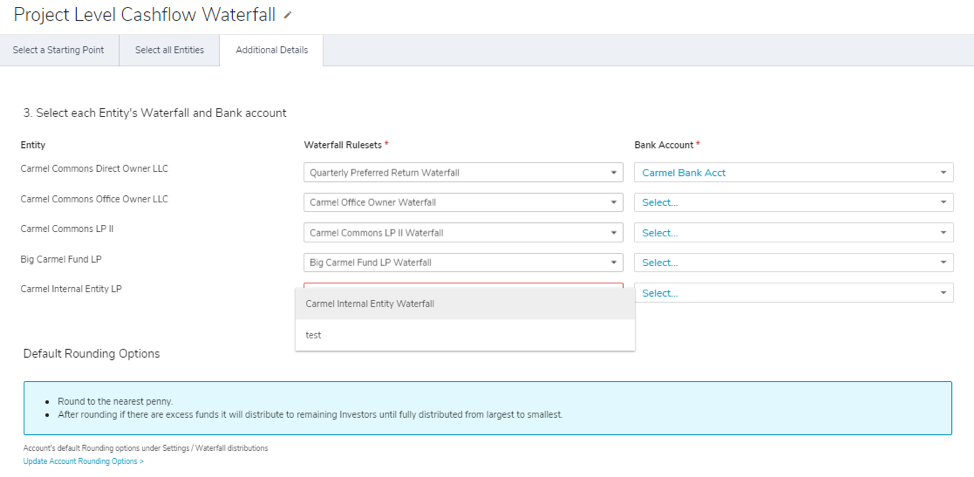
After all Entity level Waterfall Rulesets are selected, pick the Bank Account(s) you wish to use. You can have separate bank accounts for every Entity, or you can select the same for each. You will see all of the available Bank Accounts tied to the project regardless of the Entity. This means if you use the same bank account to distribute funds regardless of the Entity (i.e. have one clearing account for ACH), you can select without the need to go into each Entity and add redundant Bank information. If the account you are looking for has not been added to the Entity yet, you can select the Add a Bank Account button to do so now. If you do not plan to generate NACHA files and do not wish to add any Bank Accounts, you can simply select Use other payment method in order to move forward.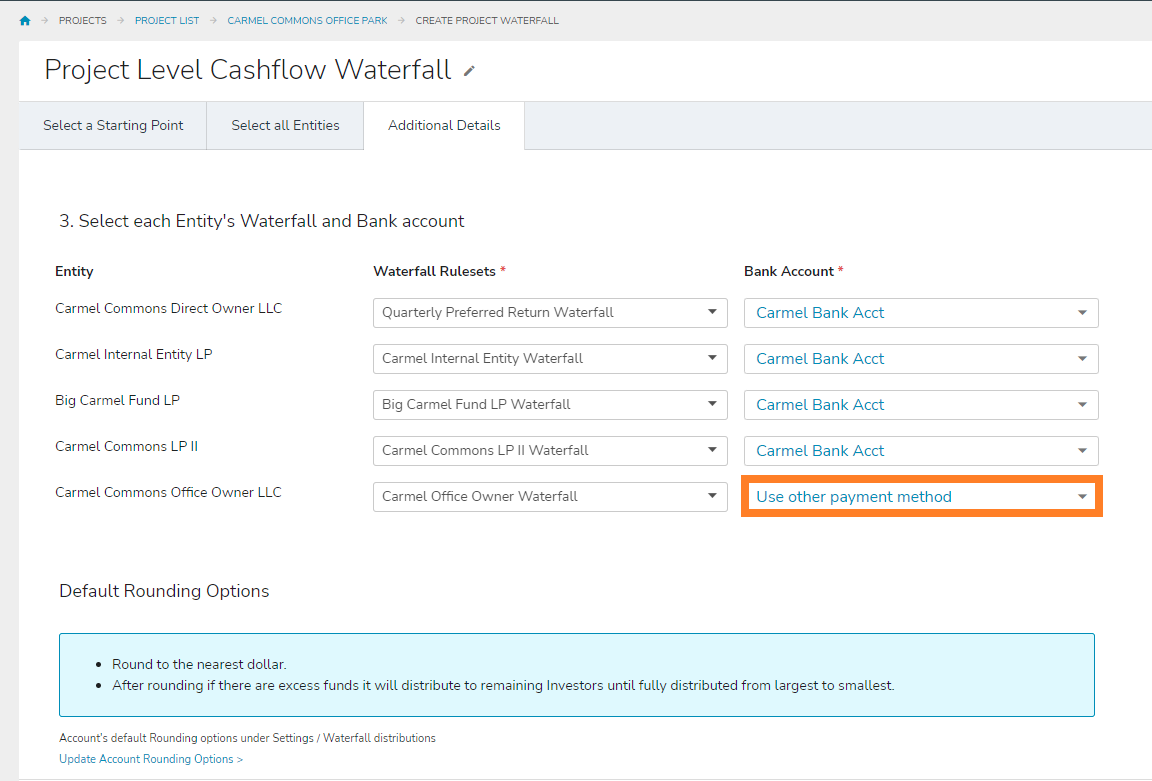
The last items to note on this page are the rounding options. Rounding options are an Account-Level setting, and provide a means for eliminating the need to adjust individual distributions for pennies or reducing the total batch amount. The system defaults to round to the nearest penny and to reduce the total batch amount by any remainder.
The other option is to round to the nearest dollar. In lieu of reducing your batch amount, you can also choose to have any remainder spread across the Entity from largest to smallest investor until all money has been distributed. If you wish to change the rounding options, you can select the Update Account Rounding Options link which will enable you to do so. You can also find this option by navigating to the Waterfall/Distributions page. To do this, select the Profile & Preferences tab at the top right-hand of the page. Next, select Investor Settings and choose Waterfall/Distributions from the list on the upper-left side of the page.


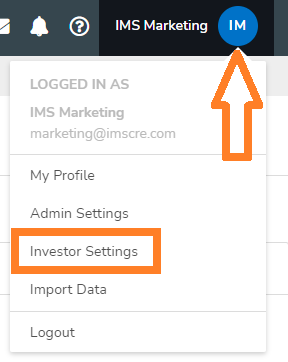
Under the Waterfall/Distributions section, you will see these two options for rounding preferences.
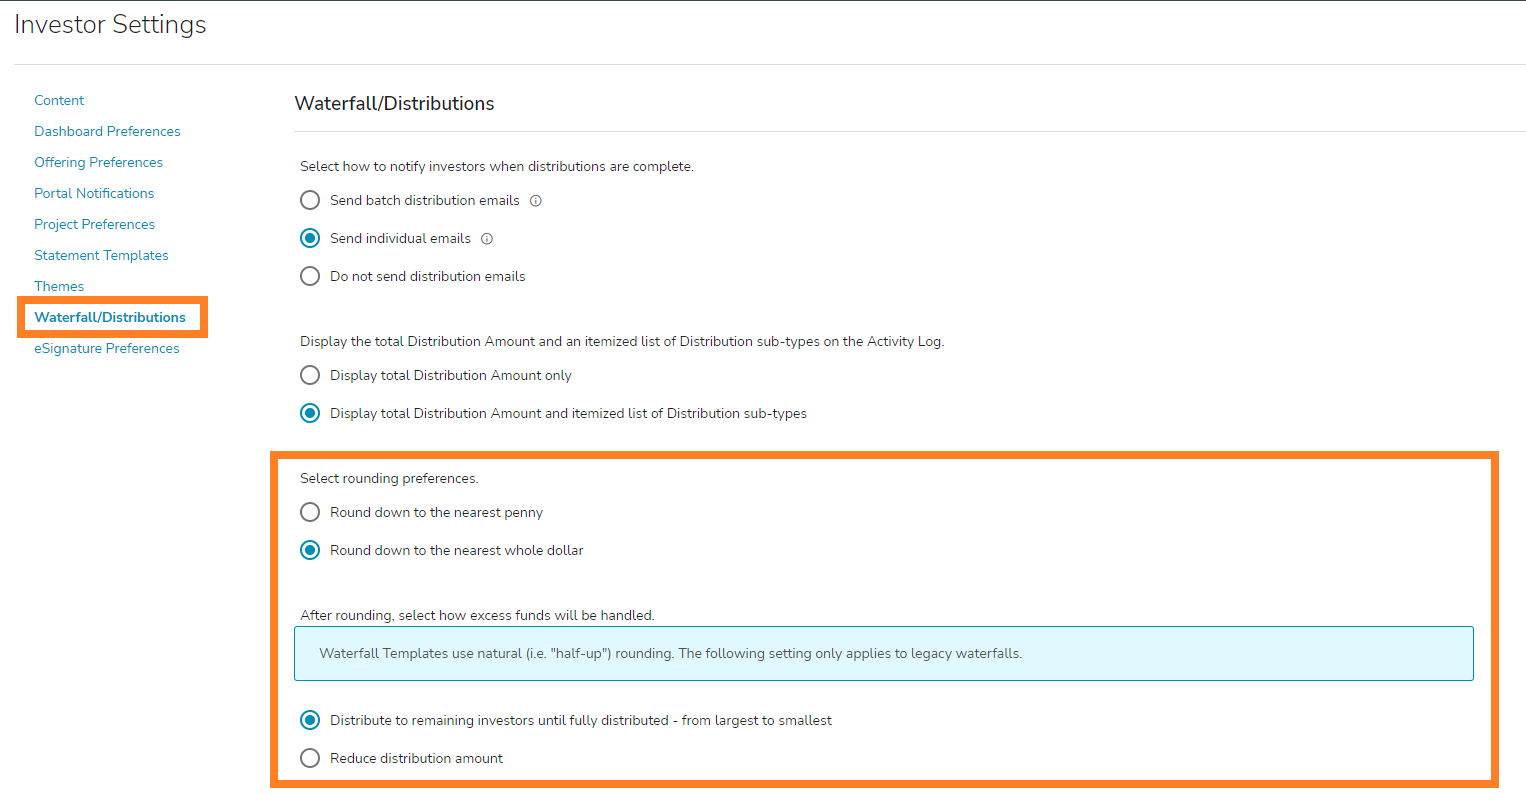
After confirming your rounding preferences and reviewing each Project Level Waterfall tab, you can either Cancel, Save, or Save & Add Project Distribution Batch. If you forget to select a ruleset or bank account, the system will prompt an error message explaining what information needs to be completed to move forward.

In this example, we select Save and navigate to the Project Waterfalls Tab. If you select the name of the waterfall, you will see a summary of the Entities impacted by this waterfall, their associated rulesets, and applicable Bank Accounts. Select Edit if you need to change any of the rulesets or bank accounts assigned to this Project Level Waterfall. You can select the hyperlink of the entity waterfall under the Waterfall column to see that specific ruleset, or begin to build a Project Distribution Batch by selecting Add Project Distribution Batch.